Integrating Commerce and Primer
This page explains how to integrate Coinbase Commerce and Primer, a no-code payments solution. Integrating Primer with Commerce lets you accept cryptocurrency payments.
Create Commerce API Key
-
Log in to Coinbase Commerce.
-
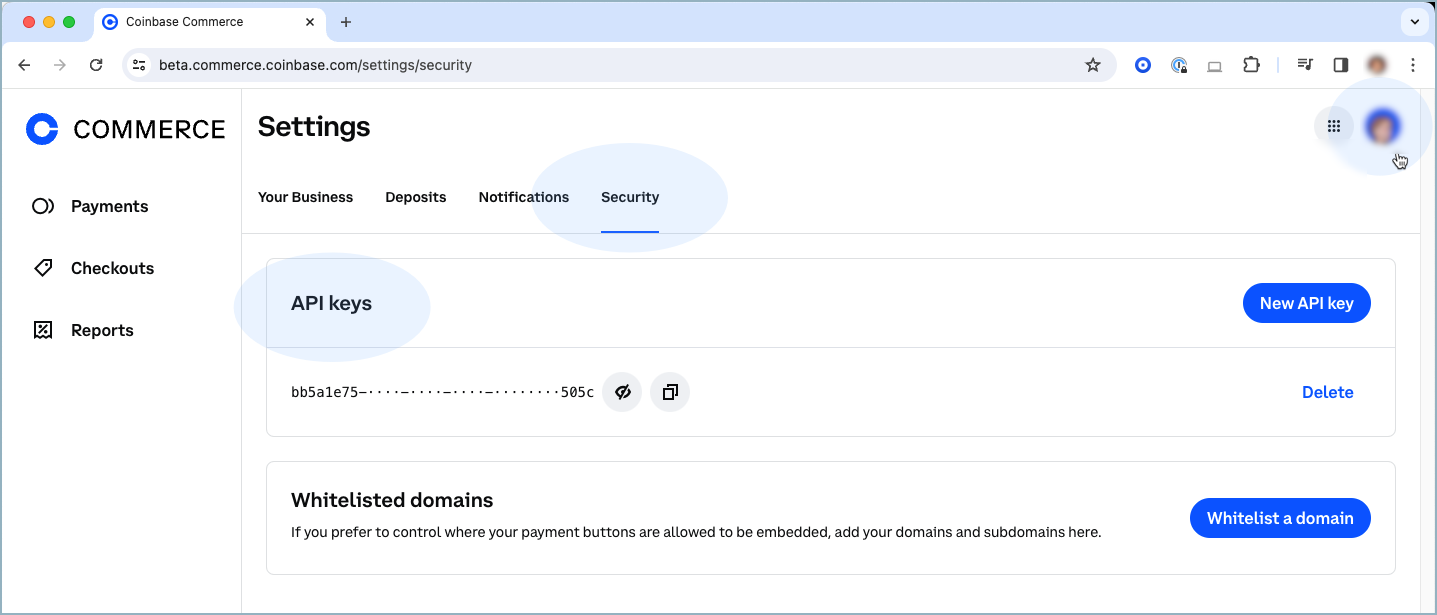
From your avatar, click Settings and go to the Security tab.
-
Under API keys, click New API key to generate a new key.
-
Click Copy to clipboard and securely store your new API key.
Click image to enlarge 
Add Coinbase Payment Method
-
Log in to your Primer Dashboard and go to Connections.
-
Select the Discover tab.
-
Search for and select "Coinbase Commerce", then click Connect.
-
Paste the Commerce API key into the API Key field.
Add Webhook Subscription
-
Log in to Coinbase Commerce.
-
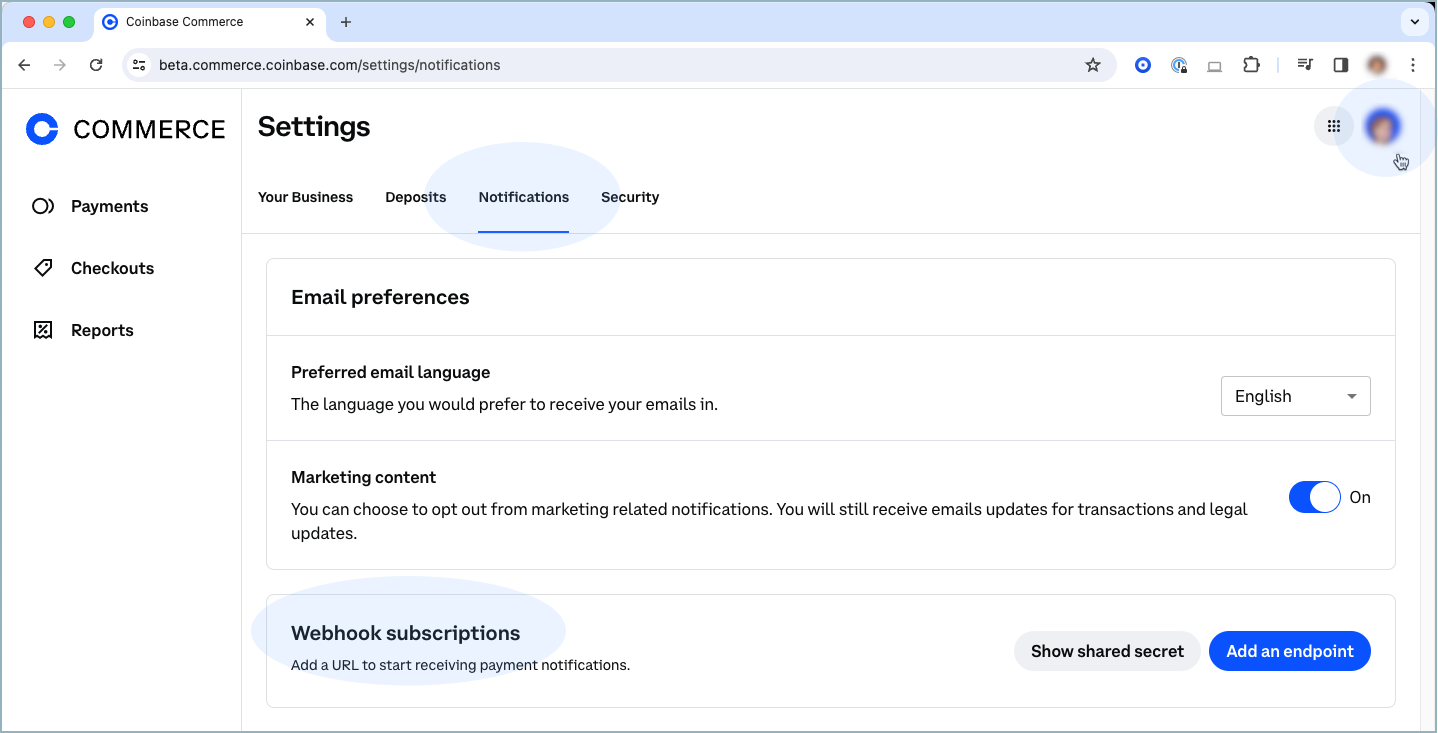
From your avatar, click Settings and go to the Notifications tab.
-
Under Webhook subscriptions, click Add an endpoint.
-
Paste your webhook URL and click Save.
-
Click Show shared secret, then Copy to clipboard and securely store your secret.
Click image to enlarge 
Activate Coinbase on Checkout
-
Return to your Primer Dashboard and go to Checkout.
-
Activate the Coinbase payment method.
Add Workflow to Process Payments
A workflow ensures that your Coinbase processor is used to process payments made with Coinbase.
-
Log in to your Primer Dashboard and go to Workflows.
-
Click Payment, then click Edit.
-
From the Method dropdown (top), select "Coinbase".
-
Create a Workflow for Coinbase:
a. Create Condition.
b. Click the plus (+) symbol on Condition and select Next Step.
c. Select "Coinbase Commerce".
d. Click Publish.
-
Go to Checkout in the lefthand navigation bar.
-
Under Payment Methods, enable "Coinbase" on your Universal Checkout.
-
Add conditions so Coinbase Commerce is shown on Universal Checkout.
-
Click the icon to the right of the toggle and add your conditions based on currency and/or amount, country or metadata.
-
Publish your checkout.
See Also: